
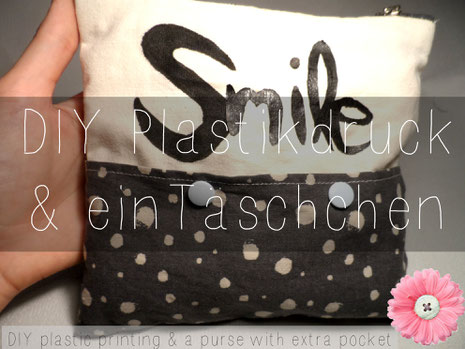
Hallo meine Lieben,
heute habe ich ein simples aber sehr hübsches Tutorial für Druck aus Plastiktüten für euch und zusätzlich noch, wie man dieses süße Täschchen mit Einschubfach näht, in dem ihr all eure Nähutensilien und Kosmtikprodukte verstauen könnt :)
Hey my dears,
today I've got a simple but very beautiful tutorial for a DIY printing made of old plastic bags for you and also how you can sew your own cute purse with extra pocket for all of your sewing utensils and your cosmetica. :)
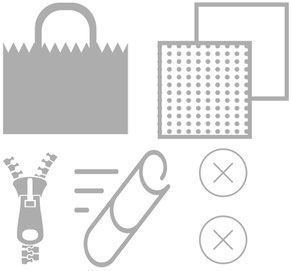
Ihr braucht:
- bunte Plastiktüte oder Verpackung
- Backpapier *
- Stoff oben 20 x 22 Zentimeter
- Stoff oben 11 x 22 Zentimeter
- Stoff unten 2 x 11 x 22 Zentimeter
- Stoff unten 2 x 5 x 5 Zentimeter
- Reißverschluss *
- eventuell zwei KamSnaps * oder Knöpfe zum Verschließen des Einschubfachs
*Affiliate-Links: Durch den Kauf der Produkte bekomme ich eine kleine Provision, ohne, dass ihr mehr zahlen müsst. Danke!
You'll need:
- colored plastic bag
- baking paper
- fabric (top) 20 x 22 centimeter
- fabric (top) 11 x 22 centimeter
- fabric (bottom) 2 x 11 x 22 centimeter
- fabric (bottom) 2 x 5 x 5 centimeter
- zipper
- if you want to two KamSnaps or buttons to close the extra pocket
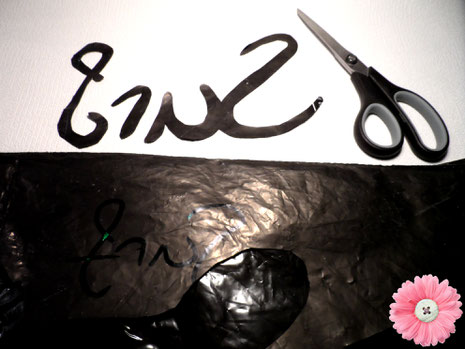
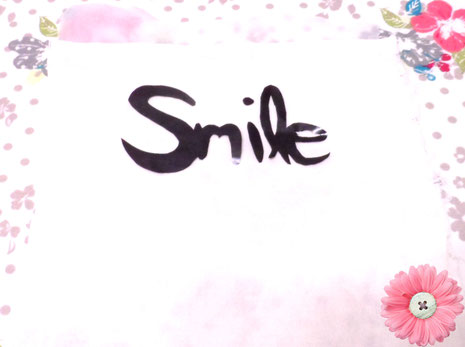
Schritt 1:
Zeichnet euer Motiv spiegelverkehrt mit einem Permanentmarker auf die ,,hässlichere" Seite der Plastiktüte und schneidet Alles aus.
Euer Motiv sollte nicht größer als 7 x 10 Zentimeter sein!
Step 1:
Draw your subject mirrored with a permanent marker on the "uglier" side of your plasic bag and cut it out.
Your motif shouldn't be bigger than 7 x 15 centimeter.
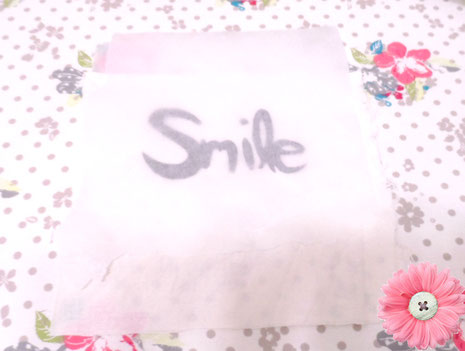
Schritt 2:
Überprüft dann , ob euer Schriftzug auch richtig ist und schneidet notfalls einige Stellen nach.
Step 2:
Check then if your writing is correct. If not edit the false parts again.
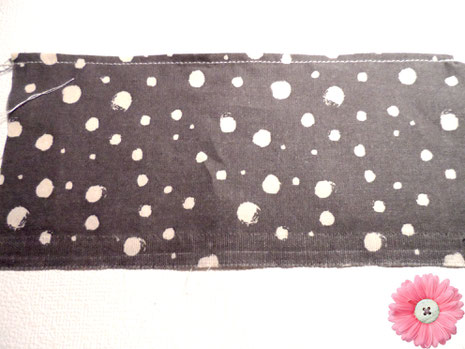
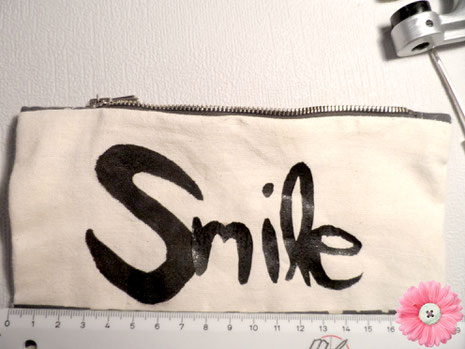
Schritt 3:
Jetzt bügeln wir unseren Schriftzug fest. Legt euren Ausschnitt dafür auf den größten Stoffzuschnitt. Oben habt ihr jetzt die 22 Zentimeter, an den Seiten ist der Stoff 20 Zentimeter lang.
(Bitte wundert euch nicht, mein Schriftzug war zu groß ^^)
Step 3:
Now we're ironing our writing on the biggest part of fabric. Lay ypur motif on it so that the top has got 22 centimeter and the sides have 20 centimeter. ( Please don't wonder - my writing was to big ^^)
Schritt 4:
Legt je eine Schicht Backpapier unter den Stoff und über den Schriftzug. Bügelt dann alles mit geringer Hitze ein paar Minuten lang fest. Macht das Bügeleisen bitte nicht zu heiß!
Step 4:
Lay one piece of baking paper under the fabric and another above the writing. Now iron it with low heat for a few minutes. Please don't let your iron become too hot!
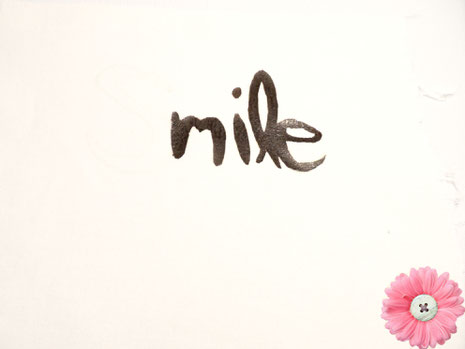
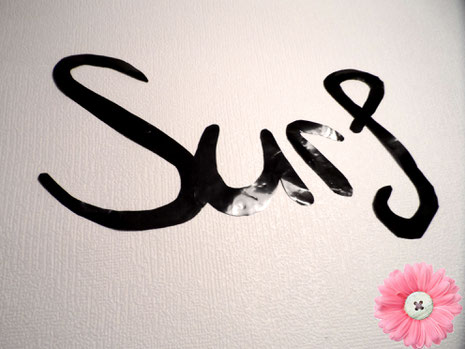
Schritt 5:
Lasst nach dem Bügeln Alles etwa 3 Minuten abkühlen, das Backpapier sollte dann seitlich abgezogen werden. Wenn ihr das Backpapier zu früh loslöst, dann könnte es sein, dass sich ein Buchstabe löst und sich zusammenrollt... Apropos: Wo ist denn das ,,S"? :D
Step 5:
After ironing, leaf it for about 3 minutes and remove the baking paper from one side. If you remove it too early it could happen that you remove one letter by mistake.. by the way: Where is the "S"? :D
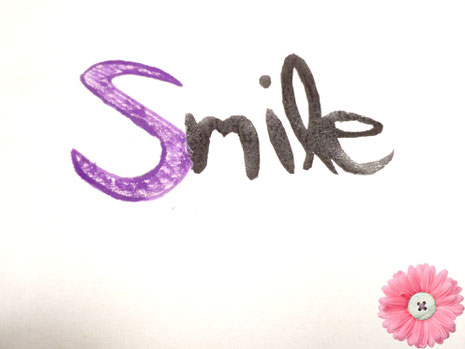
Wenn es euch auch passiert ist...
nehmt ihr euch einen Textilmarker und malt den Buchstaben nach.
If this happened to you...
just take a textile marker and paint your letter.
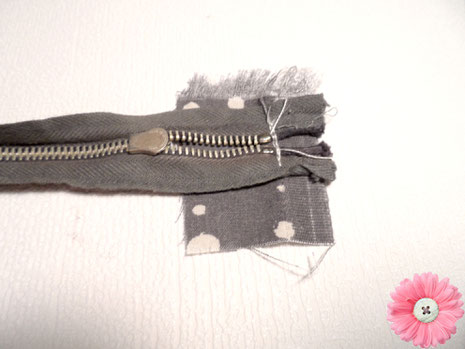
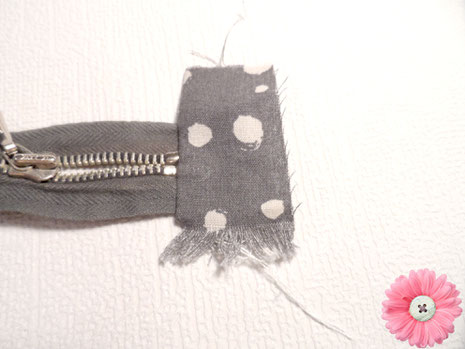
Schritt 6:
Jetzt nehmt ihr euch euren Reißverschluss und die kleinen Stoffquadrate zur Hand und näht an jeder Seite je ein Quadrat mit Geradestich fest.
Schritt 6:
Now take your Zipper and your little fabric squares and sew one square on each side .
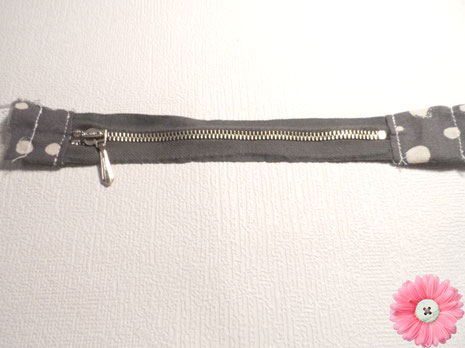
Schritt 7:
Dreht Alles um und klappt den Stoff nach oben.
Step 7:
Turn everything around and fold the fabric on the other side.
Schritt 8:
Die beiden Seiten werden dann auch noch nach unten geklappt und dann an zwei Stellen festgenäht.
Step 8:
Both sides will also be fold below and stitched down at two postions.
Schritt 9:
Jetzt nehmt ihr euch einen Stoffzuschnitt für unten und näht die lange Kante nach hinten um.
Step 9:
Now take one of your fabric parts for the bottom and sew the longer side about a half centimeter to the back.
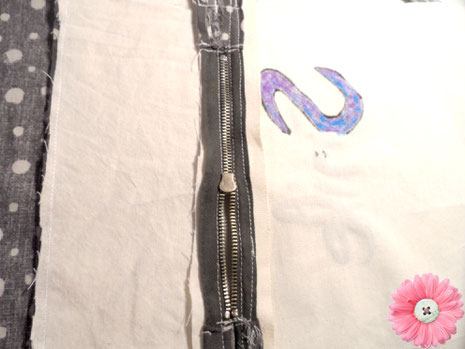
Schritt 10:
Nun näht ihr euren Reißverschluss auf beiden Seiten ein. Legt den Reißverschluss links auf links auf die oberen Stoffe und macht eine gerade Naht vom Anfang bis zum Ende der 20-Zentimeter-Kante.
Step 10:
Take your zipper and lay it with the left side on your upper fabric parts. Make a straight seam from one side to the other on the 20-centimeter-boarder.
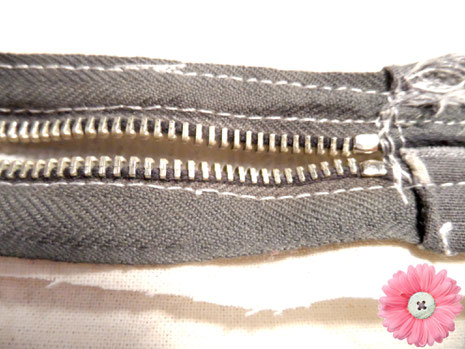
So...
sieht alles aus der Nähe aus.
This is...
how it looks from near.

Schritt 11:
Näht das kleine obere Teil an das untere Teil, welches ihr nicht umgenäht habt an der 20-Zentimeter-Kante.
Stepp 11:
Sew the small upper part and the bottom part (without seam) on the 20-centimeter-boarder together

Schritt 12:
Orientiert euch nun an der Seite, die ihr gerade zusammengenäht habt um festzulegen, wo ihr das andere Teil anbringt und steckt es dort fest. Die Unterseite der zukünftigen Tasche liegt jetzt auf der Oberseite(mit der Schrift) des großen oberen Stoffes.
Step 12:
Orientate on the side that you sewed together in in step 11 to set, where you are going to add the pocket and stuck it there. The ground of the bottom lies on top (with the printing) of the big upper fabric.

Schritt 13:
Anschließend wird alles rundherum abgesteppt.
Step 13:
Now sew around everything.
Schritt 14:
Dreht Alles auf rechts.
Step 14:
Turn everything inside out.
Schritt 15:
Messt jetzt die Breite eurer Tasche an dem Übergang zu eurem Einschubfach aus, teilt die Breite durch drei und markiert euch die Punkte.
Step 15:
Measure the lenght of your purse on the transition to your pocket, divide it by three and mark the points.
Schritt 16:
Hier befestigt ihr noch eure (Druck-)Knöpfe...
Step 16:
Here you are fixing your (push) buttons...
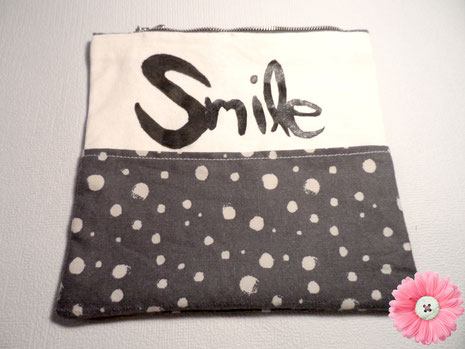
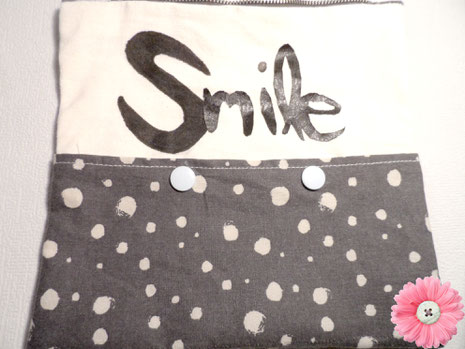
...et voilà!
Eure bedrucktes Täschchen ist fertig! Es passt einfach zu so vielen Situationen und es hat Aussagekraft!
Viel Spaß beim Nachmachen <3
Eure

...et voilà!
Your cute printed purse is finished! It is matching in soo many situations and it's showing your statement!
Enjoy imitating :)
Yours Susi <3


Kommentar schreiben
Christine (Freitag, 04 November 2016 11:20)
Ich mag das Design mit den Punkten. Sieht sehr niedlich aus!
Iris (Dienstag, 29 November 2016 22:49)
Tolle Idee.Dankefür die Anleitung.
Liebe Grüsse Iris
Melanie (Mittwoch, 30 November 2016 08:25)
Klasse Idee.
Werde ich mal ausprobieren.
Hast du da Erfahrung wie es mit dem waschen ist?
DIYCarinchen (Donnerstag, 01 Dezember 2016 11:22)
Huhu liebes. Eine echt tolle Idee, das ist eins meiner Lieblingsstücke. =) Hast du echt toll gemacht. Mach weiter so. :*
petozi (Samstag, 25 Februar 2017 20:45)
Hält die Schrift eigentlich auch beim Waschen aus?
LG Petra
Tori (Dienstag, 18 Juli 2017 22:16)
Oh was für eine süße Idee! Die Tasche ist echt schön geworden – wird echt Zeit, dass ich mir mal eine Nähmaschine besorge :)
xx Tori
simpletwentysomething.com